 |
|
|
|
Site Navigation
Projects & Information
»General Information»Wind turbine Projects »The F&P Smartdrive »Electronic projects »Microcontroller projects »Miscellaneous Kits & Parts
»Basicly Natural Pty Ltd»PVC & Aluminium blades »Scale model farm windmills »Price Watch Discussion Forums
Handy Links
»Wind»Solar »Electric Vehicles »Electronics »Micro Controllers »General Interrest About TheBackShed Getting Started Privacy Policy |
There are two halves to this project, the PicAxe circuit board, and the PC software. The PicAxe is used to make simple measurements, and send the data to a PC via a 3 wire serial cable. The software on the PC converts this raw data into real values we can understand and record. There are two different configurations. The PicAxe used, a 08M, has only 4 usable pins, so this limits our options. I could have used a 18X chip to give us several more pins, but I wanted to keep this project simple, and I had a few 08M chips in stock. But the software could easily be used on a 18X chip.
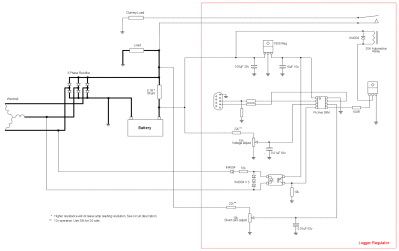
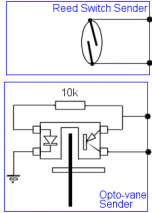
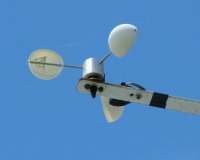
1. Logger - Regulator. Measures Volts, Amps and Windmill RPM or Wind Speed. The last PicAxe pin is used to switch the dump load. 2. Logger Only. Measures Volts, Amps, Windmill RPM and Wind Speed. PicLog. Ver 1.1 Click to enlarge
|
|||||||||||||||||||||||
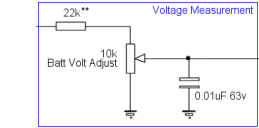
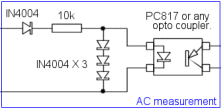
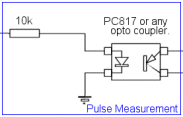
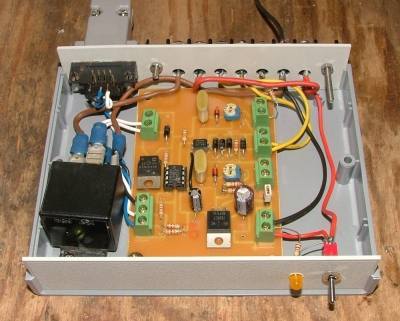
Dump Load. If the battery voltage is too high, a mosfet ( from pin 5 ) drives a automotive relay to switch a dummy load ( couple of 12v spotlights would do ) across the battery to drain off the excess power. The circuit can run on either 12v or 24v, but there are a couple of resistors that need to be changed. If you wanted to quickly change from 12 or 24 volt, a double pole switch could be used to change the resistor values. To keep it simple, I'll use 12v for the rest of the controller description. I machined my circuit board on my cnc router, but its a fairly simple circuit and you could use veroboard. If you have a cnc router drop me a email and I'll send back the dxf file. PicAxe software. Pretty simple this one. The 08M measures the battery voltage, shunt voltage, RPM and or Wind Speed, then sends this info out the serial connection at 4800 baud. The two inputs are measured as 10bit, or 0 to 1023, where 500 is equal to 12 / 24 volts. This is converted to a real value in the PC software. If the battery voltage rises above 14v ( =580 in the PicAxe , 1 volt = 40 ), it switches on the mosfet. If the voltage drops below 13 ( =520 ), it switches off the mosfet. These switching points can be changed to suit your own preferences, but this means you need to reprogram the picaxe, easy enough to do. Version 1. Logger Regulator
Version 2. Logger Only.
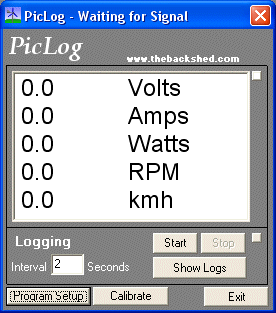
PC Software. Just a note about the PicLogs software. As well as a useful data logger, the Piclog is here as a teaching tool in electronics and software. The software developed for the Piclog is open source, meaning everyone can see the code in its raw format, learn how it works and use parts of it for their own projects. You may use parts of the PicLog software for your own projects and distribute them as your own creations, providing you dont call it a PicLog or similar ( PicLog2 for example ). If you have a "improved" or "modified" version of the PicLog, you should include the source code with your new program. Remember the PicLog is here as a teaching tool, so any version of the PicLog must include full source code so others can continue to learn from the PicLog. Written in vb6, the windows application does all the number crunching and logging. There are 4 screens, Main display, Setup, Calibration, and Logs. The main display shows the current Battery voltage, Current, Watts, RPM and/or Wind Speed. This is updated on every heart beat from the PicAxe, every 2 to 3 seconds. Typically the data from the PicAxe would look like...
V is Battery Volts, A is Shunt Volts, R is pulses per second, S is Wind Speed pulses per second, M is mode ( dummy load on or off ) The program breaks this info up into its individual values, then uses its calibration settings to get our true battery voltage, Battery current, Watts, RPM, WindSpeed and Mode. This info is displayed on the screen. If you click the Start button in the logging section, the program will start recording the values into a text file. A new text file is started for every day. The interval is set to 60 seconds be default, but this can be changed from 10 seconds to 600 seconds ( 10 minutes ).
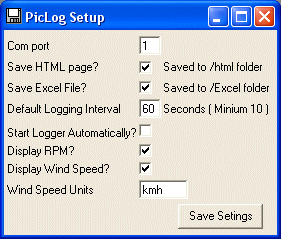
The Program Setup screen is used to set some general program settings, and saves the information to a text file called prog.cfg.
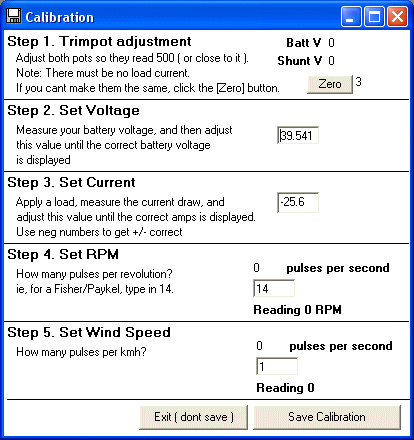
The Calibration screen is used to set up the software. Just follow the steps. Its saves the configuration as a text file called settings.cfg. Dont be tempted to edit this file, if there is a problem with it the program will crash.
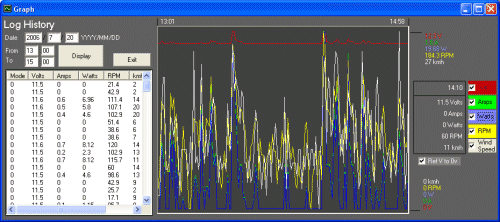
The Show Logs screen displays logs, and includes graphs. Just enter in a date and hit Display. You can then narrow down the time spread using the From and To time values. The graphs are scaled to the max and min values. If you move your mouse over the graphs, it will display the value and time, depending on where your mouse pointer is. You can also turn off and on individual traces.
HTML Page. You need to have a web server installed on the PC and a basic understanding of IIS administration if you want to use this function. If the Save HTML pages it turned on, on every heart beat the program will open a file in the HTML directory called "template.asp". It searches for tags in the HTML code, and replaces these with the actual data.
The web page is then saved as Logs.asp. You can map the HTML directory as a virtual directory in your web server. If you would prefer the page saved in another format ( html, php, jsp) please let me know. This is a sample page, I was displaying live data here, but there were too many visitors and my poor old satelite connection was crying for help.
Next page, an updated version.
|
||||||||||||||||||||||||

