|
|
|
|
Site Navigation
Projects & Information
»General Information»Wind turbine Projects »The F&P Smartdrive »Electronic projects »Microcontroller projects »Miscellaneous Kits & Parts
»Basicly Natural Pty Ltd»PVC & Aluminium blades »Scale model farm windmills »Price Watch Discussion Forums
Handy Links
»Wind»Solar »Electric Vehicles »Electronics »Micro Controllers »General Interrest About TheBackShed Getting Started Privacy Policy |
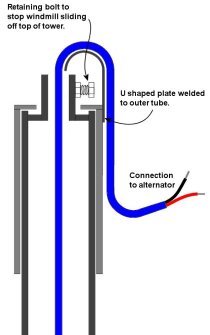
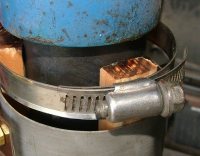
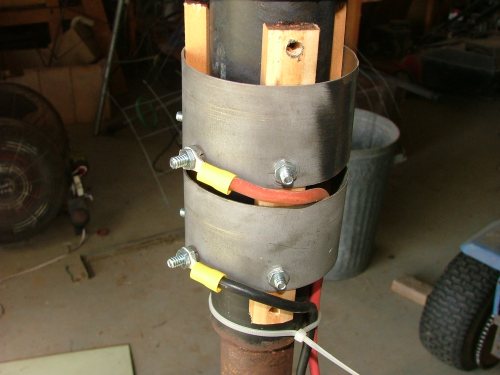
We use sliprings to transfer power between a rotating and a fixed object. When it comes to wind turbines, the sliprings transfer the power from the nacelle ( the bit at the top ) to the mast. But do we really need sliprings? Most who have built a few wind turbines would say no. I don't have slip rings on any of my turbines, instead I use a drop wire down the centre of the mast. Because I live near my turbine, I can go out to my turbine mast, unplug the drop cable at the bottom, and unwind any twist in the cable before plugging it back in. The drop wire is anchored to the nacelle, and dangles down the centre of the tower, as shown to the right. You can see this in more detail here. How often do I need to unplug and untwist the cable? Well that depends on the season, it could be once a week or once a month. So in my situation, I wouldn't consider adding slip rings to my set up. Slip rings can be unreliable, susceptible to corrosion, bugs and dust, so by not having them I don't have to worry about the problems they can cause. However, if your in a location that could see your nacelle rotate around the mast several times a day, or could be left unattended for weeks and months, then slip rings are a necessary evil.
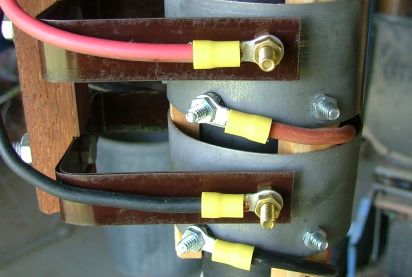
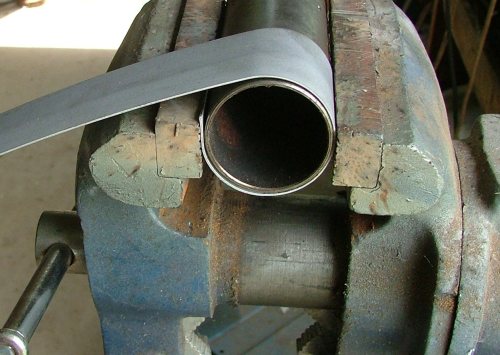
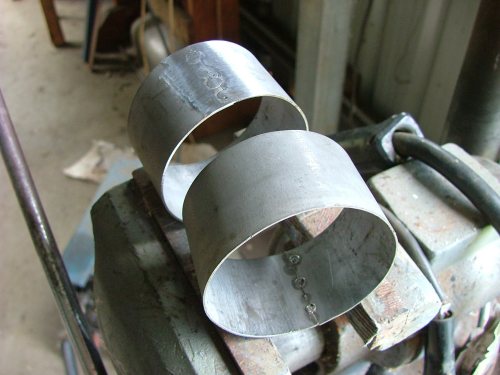
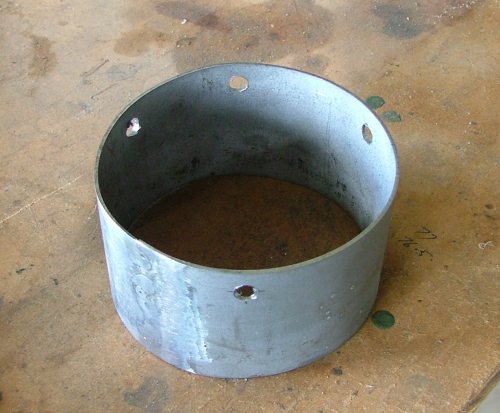
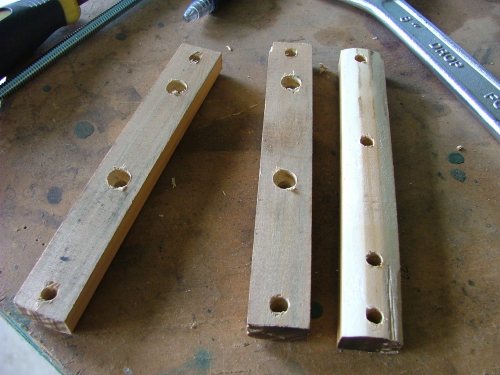
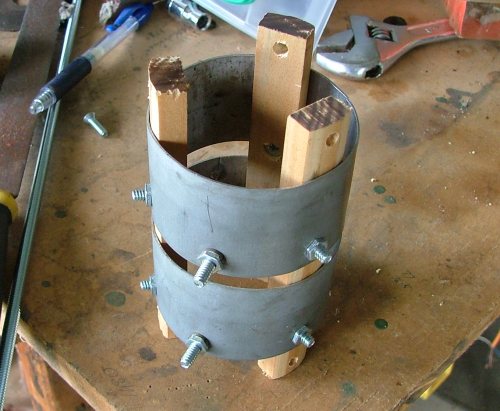
When I put this article together, I had two rules, the slip rings would be built from parts available from a hardware store, and you could have any number or rings depending on your alternator set up. With that in mind, I came up 2 designs. Both use the same slipring, but different brush assemblies. And because the rings are mounted one above the other, there is no limit on the number of rings used, within reason. Note I've used very few dimensions in this design, its up to you to work out the part sizes based on what materials you can dig up. First up, the slip ring itself. I chose to make my slip rings from zinc coated steel plate. Its a easy material to find and work with. Copper is the preferred material for slip rings, if you can find some copper sheet or copper tube that would suit, go ahead and use it. My rectifiers are at the alternator, so I only need 2 slip rings to transfer my power down the mast, but you could use this same design for 3 or more slip rings. The slip rings are fixed to the windmill mast, and spaced apart with timber insulators. Timber is easy to work with and wont melt. Timber can burn, but the rings will never get hot enough, our slip rings are well ventilated and will act like heat sinks.
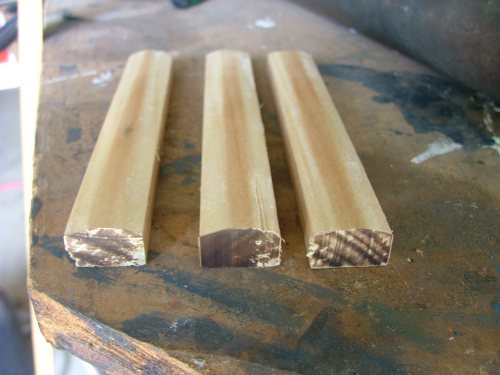
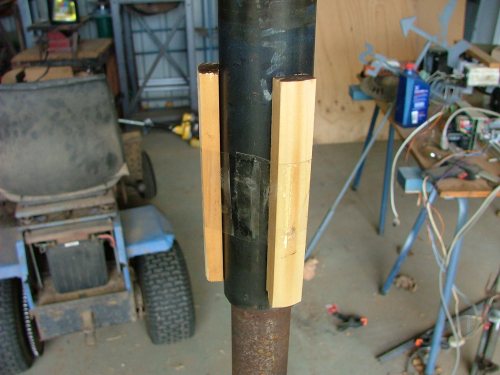
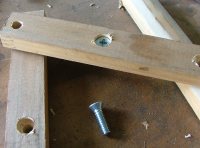
To the right is the top view of our slip rings, minus all the nuts and bolts. 3 timber spacers are used, but you could use more if you like, especially if using a softer slipring material like copper. Its important to make sure there is a air gap behind the slip rings to improve cooling. Below is sectioned side view of the timber insulator. As you can see, its a pretty simple affair. The sliprings are held to the timber insulators with screws and nuts, and you can see how the screw heads are in a countersunk hole to insulate them from the windmill mast, this is important.
|
||||||||||||||||||
|
|||||||||||||||||||