
|
|
Forum Index : Windmills : Glenn�s Extruded Blade DXF�s
| Author | Message | ||||
Steve9R Regular Member Joined: 24/01/2006 Location: AustraliaPosts: 72 |
Glenn.. Your DXF's for the hub.. how exactly do you use all the pieces ? I cant seem to work out the combination and where they all fit on the shaft with the magnet hub etc ? I think you need to add another couple of pics to your DXF page showing how you assemble it ? I know there is the project online that was done for the assembly of the mount, but it still dosent explain where the bits go ? Its sort a re-incarnation of the old hub setup you had, but are all those little triangular pieces needed ? Steve |
||||
| Gizmo Admin Group Joined: 05/06/2004 Location: AustraliaPosts: 5182 |
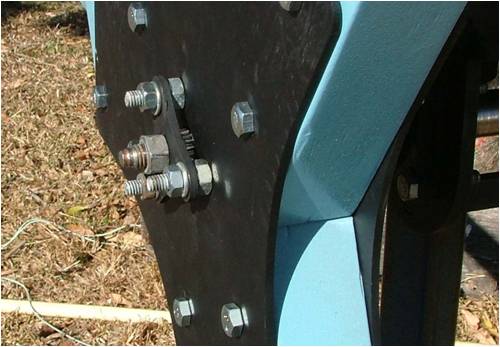
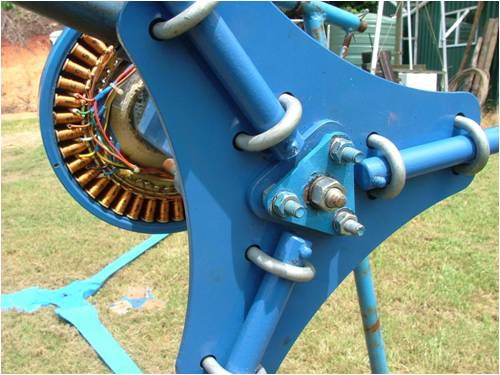
Hi Steve. All plates have 3 holes around the center. Buy a lenght of 3/8th allthread, a hand full of nuts to suit, and a handfull of nuts that are too big. The big nuts are used as spacers. The small plate with the 25mm center hole is to slide onto the shaft, past the spline. The small plate with the 13mm hole is to slide over the thread. The other plates all have a spline and are to slide over the spline part of the shaft. In what order you use them is up to you, if you want the large plate at the front, then put the smaller plates behind it. Or you can put the large plate at the black closer to the 25mm holed plate, if you want your blades closer to the tower. The allthread is used to bolt it all together. Cut 3 lengths, its length depending on what spline you are using. Put a correctly fitting nut at the front and back ( with a lock washer ), and use the bigger loose fitting nuts to take up the space between the plates. When you do up the 3 threads tight, the whole lot should slide off the F&P shaft as a complete assembly. Hope that made sense. These photos from other windmills should give you an idea, but there is no set rule on how they go together 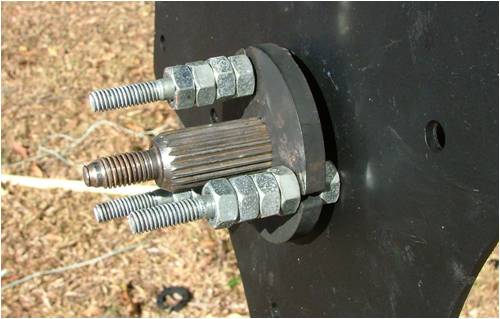
Glenn The best time to plant a tree was twenty years ago, the second best time is right now. JAQ |
||||
| Steve9R Regular Member Joined: 24/01/2006 Location: AustraliaPosts: 72 |
ahhh that makes more sense... thank you.. now i understand how you've done it.. Steve |
||||
| The Back Shed's forum code is written, and hosted, in Australia. | © JAQ Software 2026 |
