
|
|
Forum Index : Windmills : Bob�s 4 X inline F&P�s
| Page 1 of 2 |
|||||
| Author | Message | ||||
| brucedownunder2 Guru Joined: 14/09/2005 Location: AustraliaPosts: 1548 |
Hello Bob, been reading up on your 4x F&P project , sounds very challenging , could you let us know any further developments-anxious-- Bruce Bushboy |
||||
F&P murray Newbie Joined: 25/10/2005 Location: AustriaPosts: 22 |
Hi Bruce and sorry to all the guys waiting on this project. I have been up at the murray bridge property and dont have internet access. Any way the unit is very close to completion , the shaft has been made up and i am currently making the supports. The main shaft is made up out of 4 original F & P shafts machined and joined by 12 mm splines, it has 5 bearings, (4 normal bearings and a larger main bearing) i will upload some photos tommorow.
Bob Bob from Murray Bridge, SA |
||||
Bryan1 Guru Joined: 22/02/2006 Location: AustraliaPosts: 2102 |
Hiya Bob, Eh mate it looks like we're nearly neighbours Anyway good to see we share a similar interest. Cheers Bryan |
||||
| brucedownunder2 Guru Joined: 14/09/2005 Location: AustraliaPosts: 1548 |
Hey Bob , wheres them pic's of the 4 -in-line job Bruce Bushboy |
||||
Bushman Regular Member Joined: 24/04/2007 Location: AustraliaPosts: 41 |
Bob It sounds too much of a coincidence - are you the same Bob Murray from Bathurst who owed Kywong across the road from me at Jerrong? Cheers Alan - on the Gen Road |
||||
| burgo Newbie Joined: 01/05/2007 Location: AustraliaPosts: 12 |
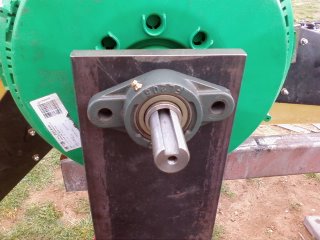
Im baaack, the inline 4 x 4 came down as fast as it went up! the problem is weight and the lack of strength in the F @ P splines when made up in to 4 units, it just doesent work. but i am now working on a new system to set as many stators as you want. ive machined a 25mm shaft and bored out 4 rotors to 25mm on a lathe, have made some discs to fix the rotors to the shaft, and prefabricated the bearing holders from steel ( similar to the ones gizmo used to sell in his kits.) ive gotten a magnificent hub from titan fans in adelaide and can put as many blades as i need on it the hub is fully adjustable and is made to fit a 25mm shaft by use of a taper lock. the shaft is held by FL205 2 bolt bearings ( 4 bolt would be better ) both ends to take all the weight and stress put out by the blades, this too is very heavy but the new system is 5 times as strong. i expect the new unit to put out about 80 amps at 24+ volts dc. the hub from titan fans is specialy made to take their blades so i got 3 of their stub blades and fitted alloy blades to them, the test unit is a twin and has worked well. see photos, more soon Bob 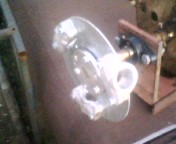 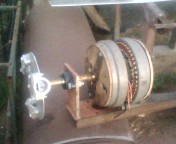 |
||||
| brucedownunder2 Guru Joined: 14/09/2005 Location: AustraliaPosts: 1548 |
Hello Bob ,,long time ,been waiting for your constructions,,, 24 volts @ 80 Amps ---=1920 watts divided by 4 = 480 watts .. That's ok, I've seen yesterday 600 watts from the .6mm stator ,, but ....one set of 10 foot blades..in a howling wind. Can you give us an idea of what the blade diameter is and some other calculations--or is this just "bench testing" results ???. cheers Bruce Bushboy |
||||
| Gizmo Admin Group Joined: 05/06/2004 Location: AustraliaPosts: 5182 |
Hey Bob good to see your back. Glenn The best time to plant a tree was twenty years ago, the second best time is right now. JAQ |
||||
| burgo Newbie Joined: 01/05/2007 Location: AustraliaPosts: 12 |
Hi guys, yesterday we had gale force winds, just what i needed for the first test, the unit put out 39 amps average 24vdc using twin 7 pole 80 series star stators. Ill take a photo of the blades and give you the dimensions of the 3 blade setup tonight ( im at work at the moment )The blade centre seems to be a little bit under strength so i will add another disc ( you bolt in as many as you want to get the desired result ) Also the angle of attack needs to be increased as the unit took too long to kick in, these blade blanks that i set the alloy blades on have a complete set of degree settings moulded in at 12 degree intervals so we can record our angles settings. Till tonight Bob |
||||
| brucedownunder2 Guru Joined: 14/09/2005 Location: AustraliaPosts: 1548 |
Hi Bob,, I got max of 22 amps @ 26 v from a .6 mm 3/7 ,,I think . .. But it was blowing a gale -- good to read your results,thanks. But , this was not constant,just building up to Max ,then falling away to zero ,then building again ,,sort of thing. I will post more as I change the stators /rotors combinations Bushboy |
||||
| burgo Newbie Joined: 01/05/2007 Location: AustraliaPosts: 12 |
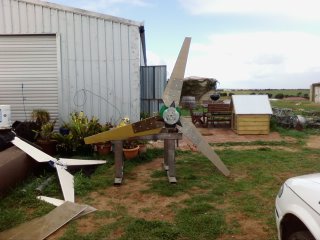
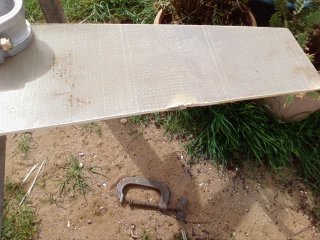
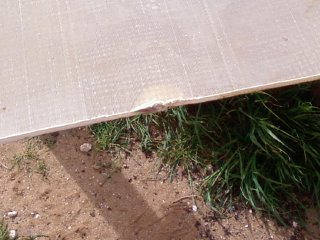
Hi bushboy im not sure if you have seen earlier posts but i have very good winds here, the house i am building has to be made to cat 3 because of them. I live on top of a hill with no trees, it was a lucern hay paddock previously. I have been testing for some time and must admit the results vary a lot even with the same stator wire sizes. Anyway its all fun. I have tried the 80sp as per econnovations book but get my best results from Glenns 7 pole star, its a good unit and almost any wire size gives good results. Now the alloy blades i made are 1200mm long x 5 mm thick the chord is 190 mm tapering to 75 mm at the tip,they turn okay but as i posted earlier the angle of attack needs to be greater. Here are the pistures of the boades and a couple of photos of a wind driven water pump i saw in Meningie in the coorong today, its 2 sheets of ton on a axle that pumped the water, very clever and simple! 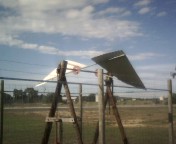 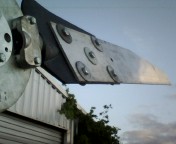 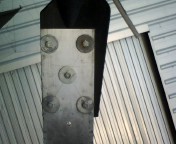 |
||||
| burgo Newbie Joined: 01/05/2007 Location: AustraliaPosts: 12 |
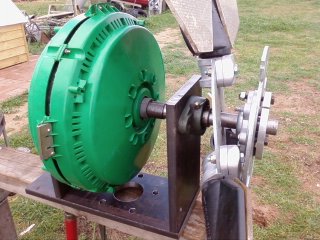
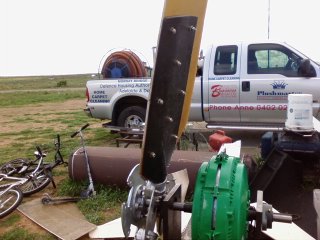
Have started work on the seely i got from Dennis Latham and decided with my engineer freind Wayne that the seely's green shroud was not strong enough to take the pressures of wind mill blades turning or violent changes in direction so made the decision that the stator would be the turning part. To do this we turned out a shaft from solid stock, milled a key way along it to carry the 3 phase wires, turned a large thread either side of the shaft where the seely wil sit and fitted 2 very large nuts to hold the unit tightly in place. We wll fold up some 10mm flat bar into a u shape, fit a 2 bolt fl205 each end to take the full weight of the unit on the shaft and fit the titan fan hub into the end of the shaft to take the blades. Trying to put pictures up but cant work out how to turn a jpeg file to a rar or zip file any ideas? bob |
||||
| brucedownunder2 Guru Joined: 14/09/2005 Location: AustraliaPosts: 1548 |
Hi Bob, Nice progress on the F&p and the Seeley. My friend Phil that has posted about his efforts is also using an industrial 5 blade position hub. It's fully adjustable and looks like it could take massive forces. Being just 20 minutes from each other we can compare our progress. I like your idea with the Seeley,you must be installing slip rings and brushes ?. I've thought of a different approach, having a large dia blade set , this on it's 'stand-alone" hub and axle. Then belt drive to a shaft that "dogs" into those 6 holes around the green cover. The dog clutch is free floating and will have rubber sleeves to take any alignment differences. Geared pulleys of the timing belt drive types in cars can be used and that way you can change the ratio's. I've stripped a Seeley,but it's on the back burner at present while I take advantage of seasonal westerly winds and do further testing on the F&P and rigging. Bruce Bushboy |
||||
| burgo Newbie Joined: 01/05/2007 Location: AustraliaPosts: 12 |
Hi Bruce, yes i am using slip rings and looked at the strength of the green shroud, Wayne my engineer freind said the shrouds strength is also in the orange fan that goes around it in the air conditioner. He feels that the removal of the orange fan surround leaves the shroud with just screws holding it together, basically its all a complete setup, and the only strength is in the outer ring the rest is just a cover to protect from moisture in the evap air conds. So the setup we have come up with puts absolute minimum pressure on the shroud, the fl205 bearings take all the weight from front to back leaving the shroud only to be held in a non rotating position. I spoke to dennis last night and we spoke about rewiring of the seely and i came to the conclusion to try the unit ( a 1500 watt x 24 v )as is in star. and use that info to build on. This unit will be pushed by 3 x 1200mm x 300mm chord x 100 mm tip fibre glass blades that i cut to size yesterday this will give .720 sq mts of blade surface area and should at least get it turning to get some results, i still cant work out how to convert jpeg files to zip or rar files to post on the site. Bob |
||||
Gill Senior Member Joined: 11/11/2006 Location: AustraliaPosts: 669 |
G'day bugo, No need to convert to zip or rar, just use the next icon to the left (tree with up arrow). That uploads jpeg file with your message. was working fine... til the smoke got out. Cheers Gill _Cairns, FNQ |
||||
| burgo Newbie Joined: 01/05/2007 Location: AustraliaPosts: 12 |
Thanks Gill, should have spotted that one so here goes 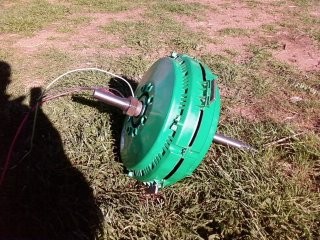 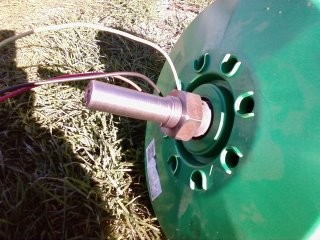 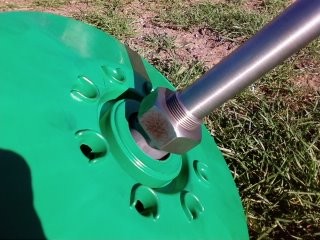 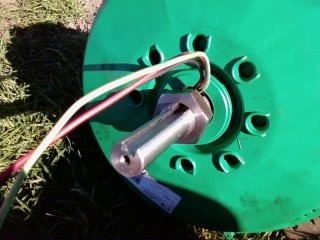 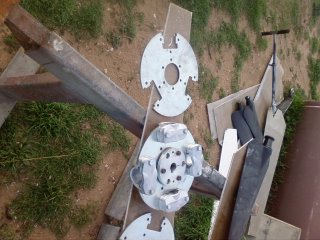 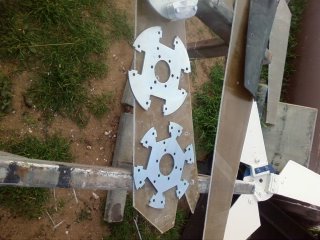 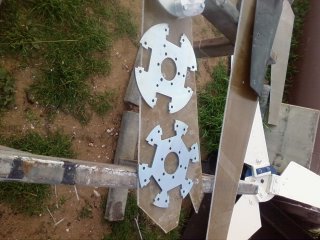 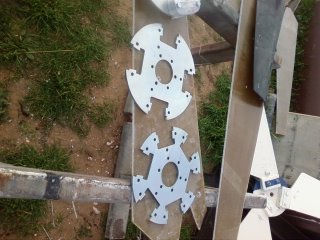 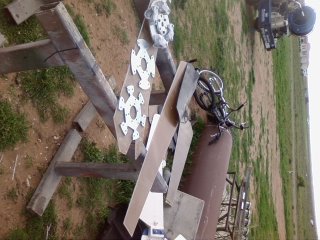 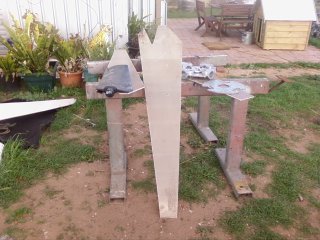 Well i seem to have got the pictures up, you can see that the Titan Fan Blades hub is very versatile, we can use 2,3,4,5,6,7,8 up tp 12 blades and the taper lock is the same for all sizes and fits any 25mm sline including the F & P. I use the the black fan stubbs and fit my blades to them with coach bolts and nylock nuts. The hub allows any degree of attack that you want and can be changed in less than 3 minutes all up plus the time it takes to bring down the windmill. Now here is something real gooder! i have at the moment an 8 blader titan exactly as it comes out of the factory and it is putting out 25.5 volts and 5 amps in a strong wind, its turning well not good enough to say that as is its all i need but a good experiment Well i seem to have got the pictures up, you can see that the Titan Fan Blades hub is very versatile, we can use 2,3,4,5,6,7,8 up tp 12 blades and the taper lock is the same for all sizes and fits any 25mm sline including the F & P. I use the the black fan stubbs and fit my blades to them with coach bolts and nylock nuts. The hub allows any degree of attack that you want and can be changed in less than 3 minutes all up plus the time it takes to bring down the windmill. Now here is something real gooder! i have at the moment an 8 blader titan exactly as it comes out of the factory and it is putting out 25.5 volts and 5 amps in a strong wind, its turning well not good enough to say that as is its all i need but a good experiment
Burgo |
||||
| Gizmo Admin Group Joined: 05/06/2004 Location: AustraliaPosts: 5182 |
You have been busy Burgo. I see your pictures go across the screen, and I bet your asking yourself how to fix it so they go down the screen. After you upload each picture, move your curser to the end of the line and hit the Enter key. You should be able to edit your post and do it, just click between each bit of picture code and hit Enter to add a line. Your pictures are well sized, very good. Glenn The best time to plant a tree was twenty years ago, the second best time is right now. JAQ |
||||
| burgo Newbie Joined: 01/05/2007 Location: AustraliaPosts: 12 |
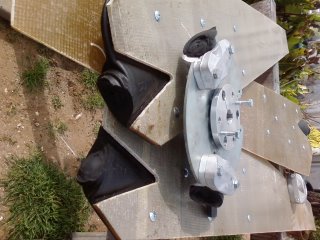
Hi guys,i have taken a few photos of my seeley project, have made the shaft,blades and total retainer unit only need to do the sliprings this week. 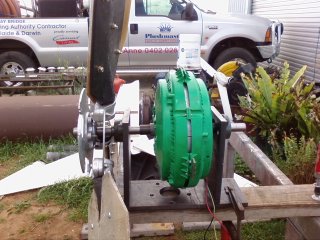
The black rear blade stubs,taperlock and retaining plate all come from Titan Fans in Adelaide at a cost of $83.00. The shaft cost $100.00 and the blades were cut from a retired submarine battery box at a cost of $50.00. The seeley was $45.00 from Dennis and all i need to makeup are the sliprings and furling tail.Friday will see the unit up on its neww pole. Burgo |
||||
| burgo Newbie Joined: 01/05/2007 Location: AustraliaPosts: 12 |
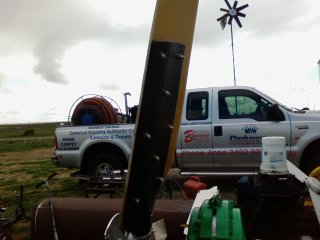
Well got the new test fibreglass blades up last night, unbalanced no cleaning of the leading or trailing edges just up there raw and they went off their faces, a bit of a wobble but i can see these types of blades have a lot more than potential they actually work extremely well. The best part is they only took a total of two hours to make and cost $50.00 but i got more than the three blades in this photo i got a total of ten blades from it!, i see that as very resonable well to me anyway. Any one interested in the fibreglass boxes they are made from you can buy them from Machinery Warehouse in Wingfield Adeliade. 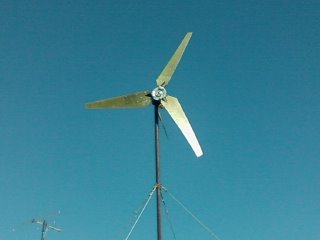
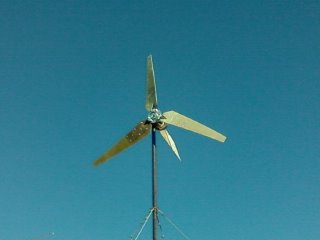
I made thes test blades fro friend and have put 4 aside for the seeley project ( see previous post ) i may even try them in a 6 or 8 configuration but i think i will need to shorten and sharpen to get gooder results. saw the blokes about the sliprings this morning. I am getting really excited about this project, i must have a big grin on my face cause my wife is giving me those google eyes oh oh i have to go that job just came in ! Burgo |
||||
| burgo Newbie Joined: 01/05/2007 Location: AustraliaPosts: 12 |
Have done some destruction testing on these new fibreglass blades i have made from the battery boxes, i shortened the distance from the hub to the pole and arranged things so that the blades would strike the pole. Had a major wind last night and in previous tests with wood and plastic blades they all broke some where along the centre part of the blade. But to my surprise this did not happen,the chord retaining blocks snapped and the fibreglass blades remained intact with just bruising to the blades, this tells us of the strength of the blade itself but does not make a failure of the chord retainer blocks as they were never intended to put up with that amount of stress, that is total destruction type stress. Here are a few pictures, 
also i have noticed that the three blade hub is a lot thinner than the 4,6,8+ hubs so in a running unit i would double the thickness to stop possible flexing. Burgo |
||||
| Page 1 of 2 |
|||||
| The Back Shed's forum code is written, and hosted, in Australia. | © JAQ Software 2026 |

 . My farm is at Kanmantoo well just a couple of k's away and maybe we catch up sometime. If you haven't got a lathe or machines I have a machineshop so I can help you out if needed. With my work I'm busy 5 to 6 days a week but at this stage i've got sundays off.