| Author |
Message |
Trev

Guru

Joined: 15/07/2006
Location: AustraliaPosts: 676 |
| Posted: 01:17am 11 Apr 2007 |
 Copy link to clipboard Copy link to clipboard |
 Print this post |
|
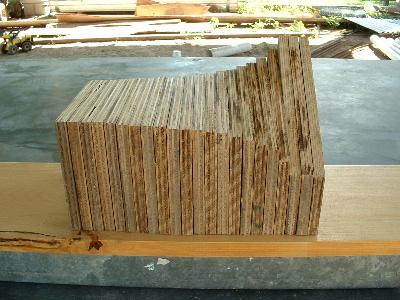
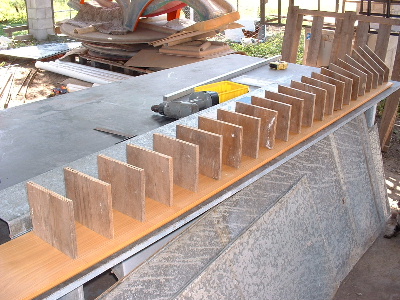
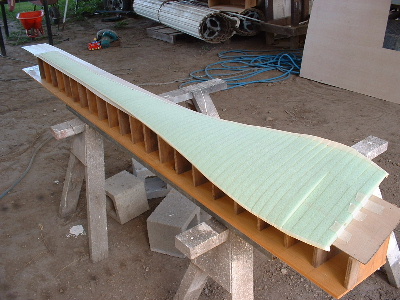
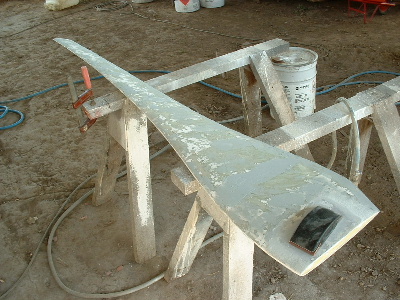
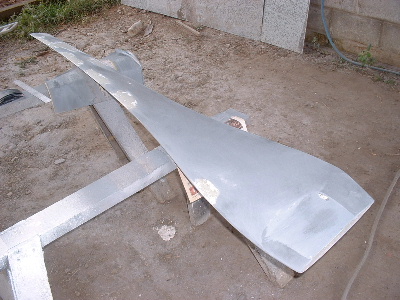
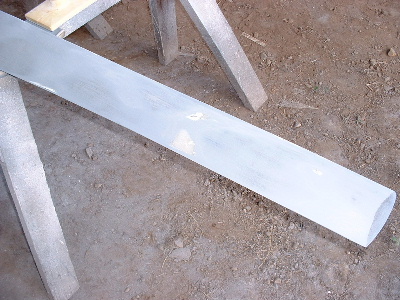
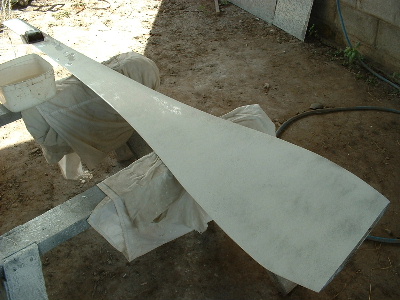
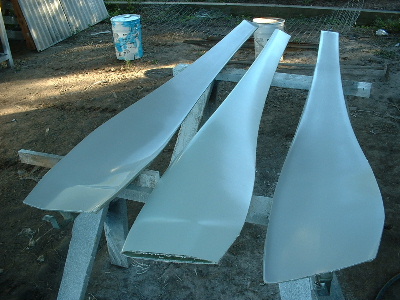
Picked up the aerofoil profiles yesterday...Thanks Glenn for the brilliant computer graphics & cnc router work.
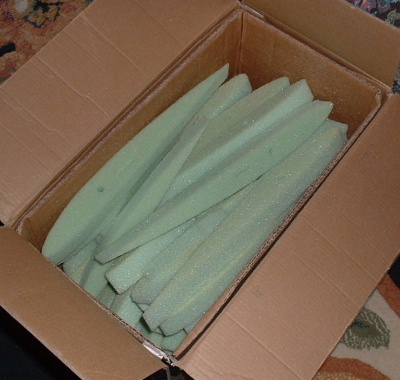
As most of you are aware I have made my own blades with f/g composite and I had worked out all the angles using trigonometry. They do work well.
Since being introduced to the back shed website, I have now seen many other examples of people's work etc including some 'blade calculators'. All are different.
At this point I am asking for opinions. Questioning my own logic.
The blade length is 2m.
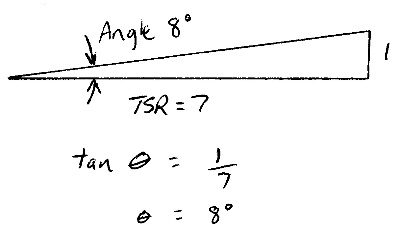
Tip speed ratio is the speed at which the tip should travel compared to the wind speed. TSR of 7, the blade calculators have an angle of less than 0.5 degrees, one had it at -0.6 degrees. I think a TSR of 7 is 8 degrees. Am I missing something?
Likewise, all other angles along the blade is different.
I calculate like this.
Calculate the circumference at points along the blade. Select the tip angle of 3 degrees (at Radius 2m)& use trignometry to calculate a 3rd number in the equation.
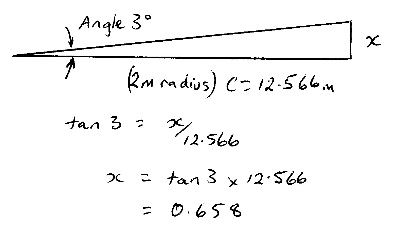
Then use this to calculate all other angles. Next is 1.8m radius.

Am I right or wrong? Is there other factors that need to be considered. Any ideas please.
ThanksEdited by Trev 2007-04-12
Trev @ drivebynature.com |
| |
petanque don
Senior Member

Joined: 02/08/2006
Location: AustraliaPosts: 212 |
| Posted: 02:03am 11 Apr 2007 |
Copy link to clipboard |
Print this post |
|
I don�t know enough about the angles to make a comment but considering the recent posts about tripping boundary layers and noise will some sort of ridge be on the convex (downwind) surface? |
| |
Gill

Senior Member
Joined: 11/11/2006
Location: AustraliaPosts: 669 |
| Posted: 11:16am 11 Apr 2007 |
Copy link to clipboard |
Print this post |
|
G'day Trev,
Your calculations make no allowance for the 'angle of attack' which remains the same at each station. The blade calculators typically use 4deg but larger angles generate more lift. All blade calculators allow you to specify the angle of attack.
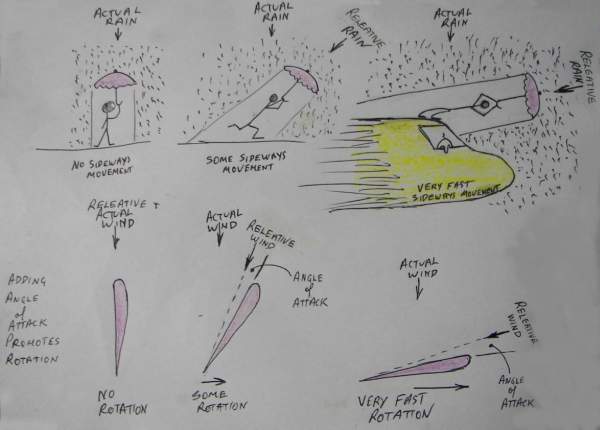
Your calculations seem to be for a feathered blade. Hence I expect a worsening error for stations closer to the hub.
To test if this is the sole error, nominate a 0 deg AofA (blade feathered) and compare with your calcs then.
Edited by Gill 2007-04-13
was working fine... til the smoke got out.
Cheers Gill _Cairns, FNQ |
| |
Trev
Guru
Joined: 15/07/2006
Location: AustraliaPosts: 676 |
| Posted: 10:56am 19 Apr 2007 |
Copy link to clipboard |
Print this post |
|
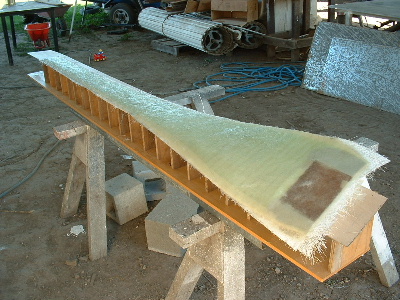
Thanks Gill, greatly appreciated.
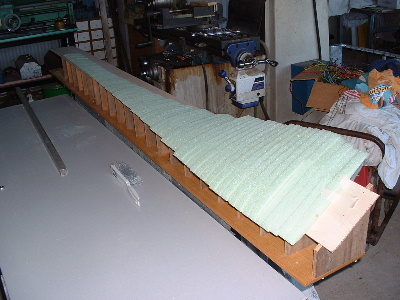
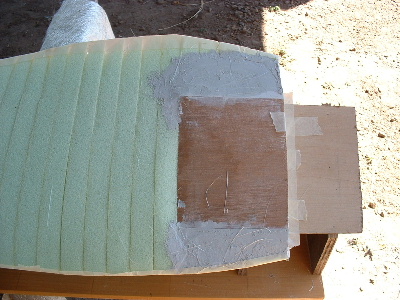
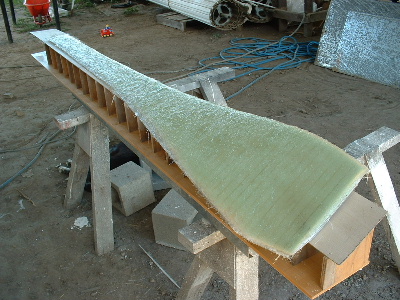
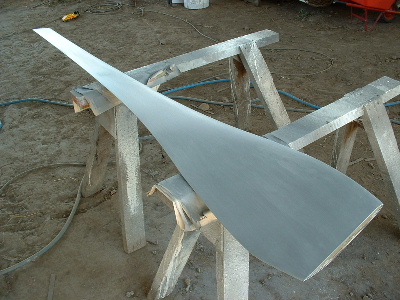
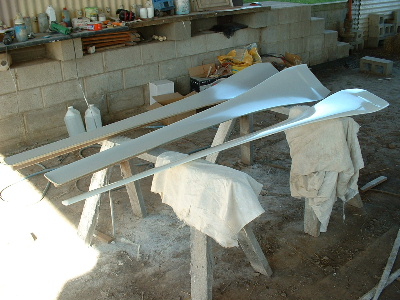
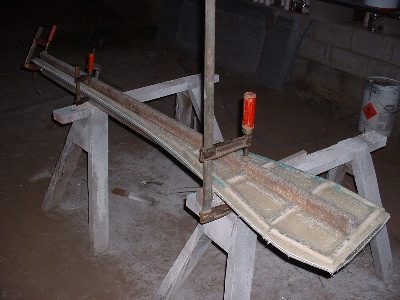
We now have the blade f/glassed and one side flowcoated.

Trev @ drivebynature.com |
| |
Gill
Senior Member
Joined: 11/11/2006
Location: AustraliaPosts: 669 |
| Posted: 12:35pm 19 Apr 2007 |
Copy link to clipboard |
Print this post |
|
Way beyond my resources and ability. 
Looks good though. 
What's the gen? 
was working fine... til the smoke got out.
Cheers Gill _Cairns, FNQ |
| |
Feral
Newbie

Joined: 03/12/2006
Location: AustraliaPosts: 39 |
| Posted: 02:45pm 19 Apr 2007 |
Copy link to clipboard |
Print this post |
|
Trev, I havent posted for many months but I read all of the new postings every day and I would like to suggest another method of constructing your blade if in the event that you are not happy with the final results of the method your are trying now in the above posts.
Would it be easier to start with one peice of solid soft rectangular timber the length required and with the aid of Glen's roughter cut the templates at each end and at several points in between and then remove the excess between the templates so as to end up with one solid timber blade to use as a plug for the making of one two peice mould so that the front and back , filled with foam glued together with the appropriate glass tape and polyester resin along the join. This way ever blade would be exactly the same and changes could be made to the existing moulds if required. Also could you provide some dimentions of the blade on another photo of the white blade. |
| |
brucedownunder2
Guru
Joined: 14/09/2005
Location: AustraliaPosts: 1548 |
| Posted: 09:25pm 19 Apr 2007 |
Copy link to clipboard |
Print this post |
|
WoW,, what a great effort. congratulations to both of you.
Following your progress ,hope they turn out to be the answer to our low wind and geared machines--
Thanks
Bruce
Bushboy |
| |
Trev
Guru
Joined: 15/07/2006
Location: AustraliaPosts: 676 |
| Posted: 11:31am 09 May 2007 |
Copy link to clipboard |
Print this post |
|
Hi Bruce, something you have been waiting for, you can only juggle so many at a time, some get dropped.
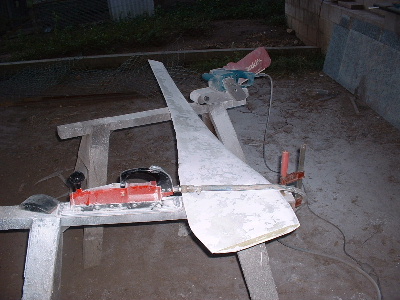
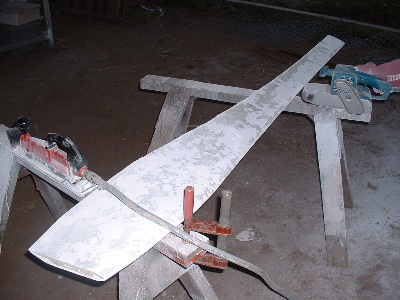
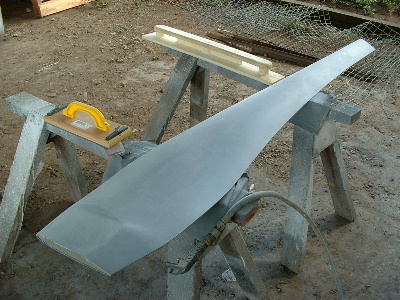
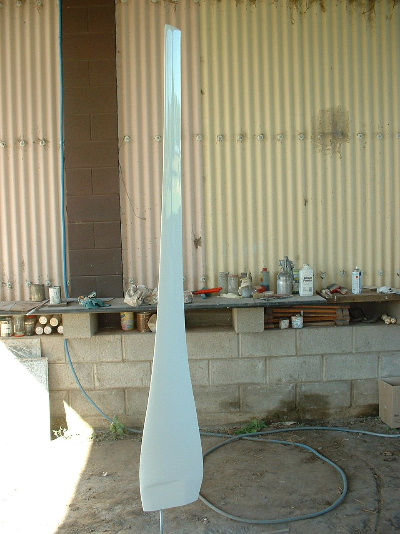
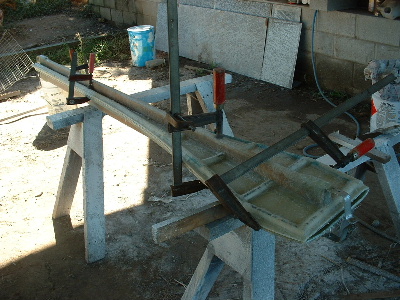
Back on the long prop blade. Rough sanded with heavy machines.... course grit to cut out all the big lumps. Plenty of dust.
Glenn, you don't have to feel itchy.......
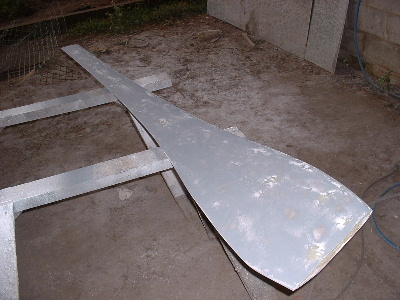
Filled holes etc with polyester filler and sanded off by hand, all the time checking for undulation. Applied 1 coat of spray primer/filler so it is easier to see where needs to have more polyester filler. Sanded out with finer grit. Then 3 coats of primer/filler has been applied.
Trev @ drivebynature.com |
| |
brucedownunder2
Guru
Joined: 14/09/2005
Location: AustraliaPosts: 1548 |
| Posted: 08:26pm 09 May 2007 |
Copy link to clipboard |
Print this post |
|
Thanks, Trev.
They look great, we are starting to receive some winter winds here ,light,but better than nothing,so I'll be interested in flying them with my geared (1;1.3 ) hub ,then build a new hub with your dual F&P bearing holder.
I'm scrounging around for a motorbycle disc brake and caliper (one of those smallish ones),having successfully used the pushbike disc ,I'm convinced they are successful for total shutdown.
How's the ev going ,hope you are over the worst with the licence inspection ?
Bruce
Bushboy |
| |
Trev
Guru
Joined: 15/07/2006
Location: AustraliaPosts: 676 |
| Posted: 11:18am 14 May 2007 |
Copy link to clipboard |
Print this post |
|
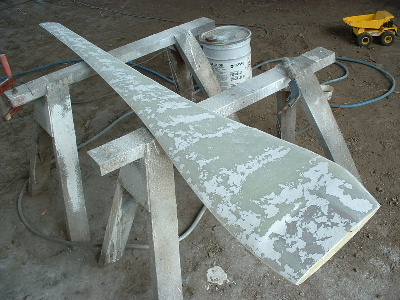
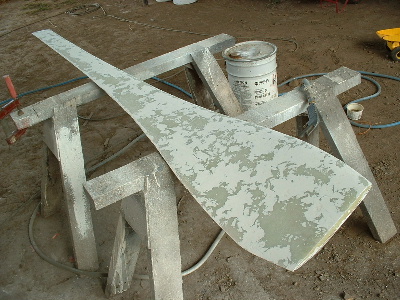
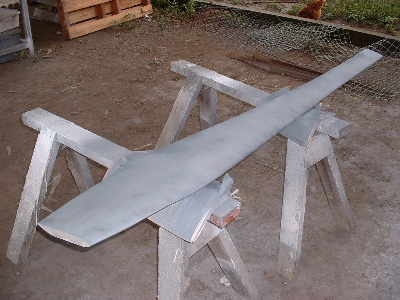
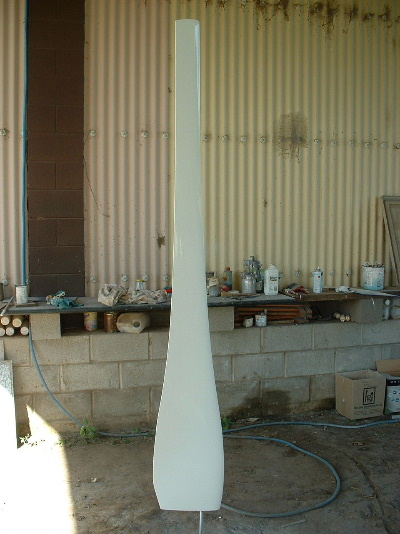
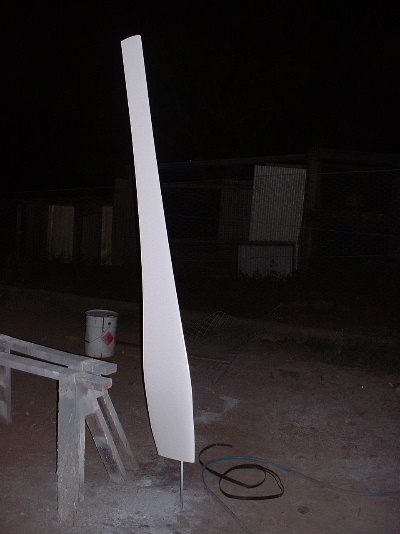
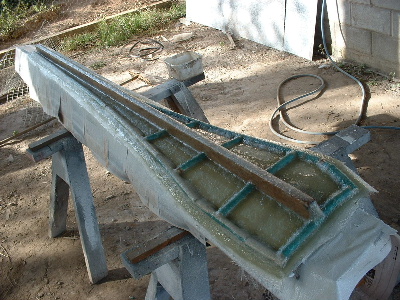
Been very busy with this big blade. Plenty of sanding and filler, & filler & sanding. (Even the Torture Board). More primer/filler. More sanding. Nearing the end where it gets real hard to pick the surface variations, we use a light dusting of black paint to highlight low & high areas as it is sanded off. It is now painted with white 2 pack paint. Several days (should be 1 week) for this to harden enough so not to have any reaction with the fibreglass moulding.
Edited by Trev 2007-05-15
Trev @ drivebynature.com |
| |
Trev
Guru
Joined: 15/07/2006
Location: AustraliaPosts: 676 |
| Posted: 08:35am 02 Jun 2007 |
Copy link to clipboard |
Print this post |
|
Apologies for the long wait, Computer Troubles
The lovely ladies (wife & siter) have excelled.
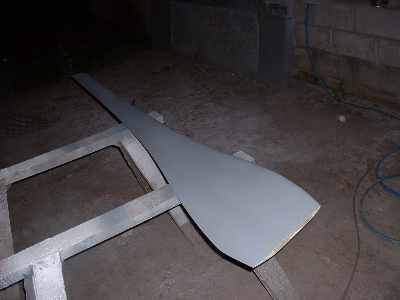
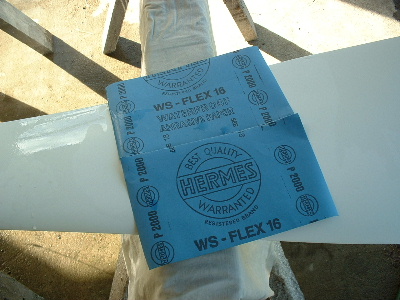
The blade surface was not good enough, so black dusted & sanded with 240 grit wet&dry. Then repainted with white 2pack.
When paint was dry enough, I then sanded with 2000 grit wet&dry and buffed, polished and waxed.
For moulding, it was waxed with a mould release wax and sprayed with a release agent, gelcoated, and plenty of glass over with strengthening ribs to keep it straight. Each side was done seperately and had to be left long enough for the f/glass to cure well enough to hold the shape. Edges cut off with a diamond saw and sanded back to give the required gap between the 2 halves.
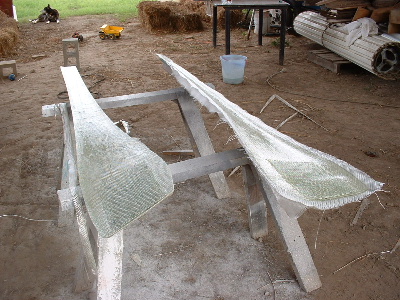
The first of the blades is now curing in the moulds. We use only woven glass for a few reasons,
1) extra strength
2) uniform thickness
3) reduced weight
4) easier to control balance
Trev @ drivebynature.com |
| |
brucedownunder2
Guru
Joined: 14/09/2005
Location: AustraliaPosts: 1548 |
| Posted: 09:17pm 02 Jun 2007 |
Copy link to clipboard |
Print this post |
|
Wow,, so professional. Nice looking blades coming along ,trev ,Marcy,sister,son,..
I never thought there would be so much detail and work ,so much for the "others' that say ,"oh, I whacked up a set of blades ,Saturday afternoon," haha. My set of Oregon pine 12 footers took me around a year to build ,on and off.
By the way ,,I won't be needing them next Saturday,I'm busy.
Bruce
Bushboy |
| |
Trev
Guru
Joined: 15/07/2006
Location: AustraliaPosts: 676 |
| Posted: 10:44pm 05 Jun 2007 |
Copy link to clipboard |
Print this post |
|
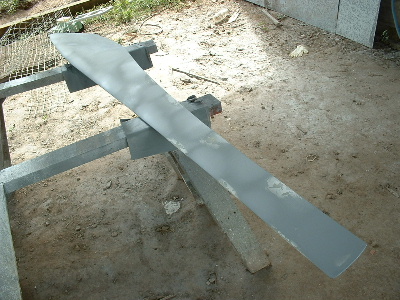
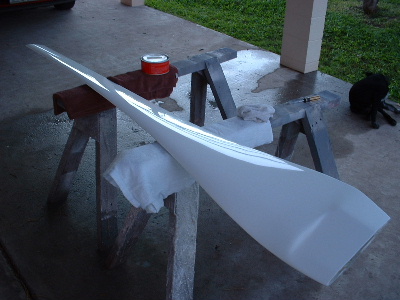
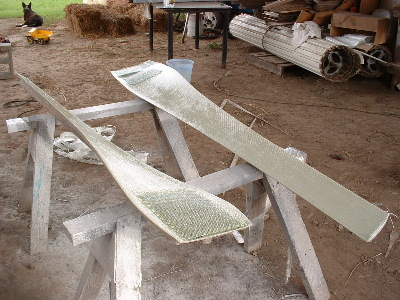
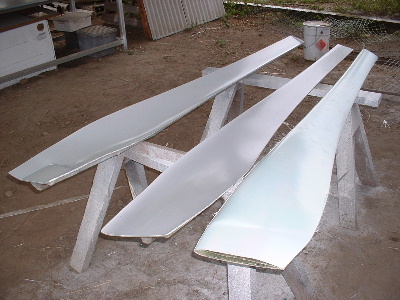
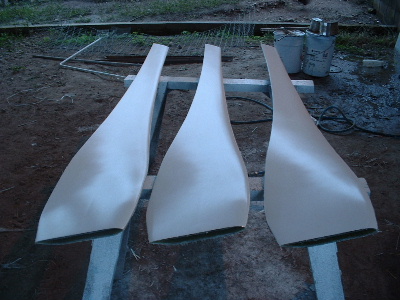
First set of blades out.
Probably Ok, but I think it is a little too flexible. Some changes will be incorporated to make them stiffer.
Will also make some locaters on the moulds to aid in getting the two halves together easier in the future.
Plenty of rain and very high humidity here at the moment, so will have to wait for a while.
Trev @ drivebynature.com |
| |
Trev
Guru
Joined: 15/07/2006
Location: AustraliaPosts: 676 |
| Posted: 10:23am 12 Jun 2007 |
Copy link to clipboard |
Print this post |
|
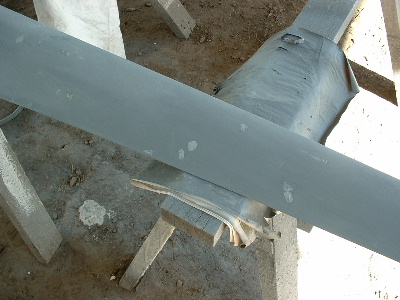
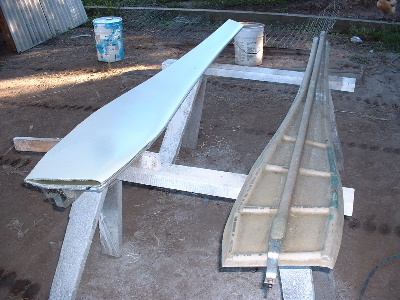
Locaters on each end do make it a lot easier in putting them together.
Added a ridge down the thicker part, high enough to join onto the other half.
Used a different method for joining....glue. Takes a little longer in making them but joint is much stronger.
This one is now out and feels much better, so Bruce it is getting much closer to having a test run. The 2nd made this way is in the mould. A few days to cure, and then make the 3rd of the set.
Have now worked out the cost for these blades, hope you are sitting down. Set of 3 blades $780. But for now, special for 'the back shed' I will make for $480, until I get sick of making them.
Trev @ drivebynature.com |
| |
Trev
Guru
Joined: 15/07/2006
Location: AustraliaPosts: 676 |
| Posted: 09:44am 24 Jun 2007 |
Copy link to clipboard |
Print this post |
|
Finally finished the first set of 3. The rain and humidity held up the process.
Bruce, these will be packaged and sent to you soon.
A sanding with wet & dry and painting will take care of the light surface texture.
For balancing, you can drill a small hole in the back at the end, sit the end on some scales and add araldite to bring the weight up to the heavier one.
To drill the holes for the hub, make a template from cardboard and drill one side, place hub in centre and drill through the other side.
You will also need to seal off at the hub after it is all fitted up and balanced properly. In the event off rain filling up the blade that is hanging down, a severe unbalance will occur and may not all come out before is get spinning again.
Have fun Bruce... and we want to know the results.
Edited by Trev 2007-06-25
Trev @ drivebynature.com |
| |
Robert_VK2BBR

Regular Member

Joined: 31/12/2006
Location: AustraliaPosts: 67 |
| Posted: 02:10am 22 Jul 2007 |
Copy link to clipboard |
Print this post |
|
Hi Trev this looks fantastic, have you had any feedback on how they fly? Bruce have you got some in the air yet???
cheers Robert
1555 W grid connect system since Jan 08
both vehicles running on modified, used vege oil. |
| |
brucedownunder2
Guru
Joined: 14/09/2005
Location: AustraliaPosts: 1548 |
| Posted: 08:03am 22 Jul 2007 |
Copy link to clipboard |
Print this post |
|
Hi Robert and Trev ,,
Have been to the "scrap yard " and got some 10mm thick plate al ,so will shape that to fit inside the blades ,plus some "bog" ... ,then will attach these "stubs" to steel angles to make an adjustable strong fitting onto the hub..
more to come ,,as I get time...
Bruce.
Bushboy |
| |
